

Open Source Shield 5.0 Tutorial
Open Source Shield 5.0
Welcome and thanks for helping out!

The following Open Source Shield (OSS) parts (there are just three) can all be purchased on Amazon. With Amazon Prime, it can take 2-4 days for these items to arrive.
PART NUMBER 1
Two clear plastic 18 x 36 sheet for face shield:
LovePads 1.5mm Thick 18 x 36 Inches Clear Table Cover Protector
Two sheets of the 18 x 36 sheets will produce 6 shields. Step 1 of this tutorial covers this. Looking at more efficient slicing up of these plastic sheets to get as many shields as we can. We're on the hunt for less costly plastic covers. If you can locate a cheaper one on Amazon, that can deliver in 2-4 days, please let us know.
PART NUMBER 2
Velcro-like strips:
Strenco 1 Inch Self Adhesive Hook and Loop Strips - 5 Yard Set
PART NUMBER 3
One of Option A: 1" x 3/4" Foam for forehead padding:
Foam Weather Stripping 2 Rolls - 1 Inch Wide X 3/4 Inch
Two of Option B: 1" x 3/8" Foam for forehead padding (need to double layer):
Foam Weather Stripping 2 Rolls - 1 Inch Wide X 3/8 Inch Thick
On April 7, we noticed that Amazon was running low on 1" x 3/4" foam. If you cannot purchase the 1" x 3/4" foam, we are recommending that the 1" x 3/8" foam (Option B above) be used instead. However, you'll need to double-layer Option B to get the same height as Option A. 3/8 + 3/8 = 3/4.
Let's begin the Open Source Shield tutorial.

Tools needed. You can use either a box cutter or pair of scissors to cut the plastic for the shields. Whatever you feel comfortable using. However, if you happen to have children helping out, do let them even look at the box cutter. Safety first!

Supplies. We're showing the Face Shield and Headband already cut to size. We recommend you use a cardboard template for the shield itself. Then outlining it on the plastic sheets with a sharpie or blue tape.
PLASTIC SHEET No. 1 - 4 SHIELDS
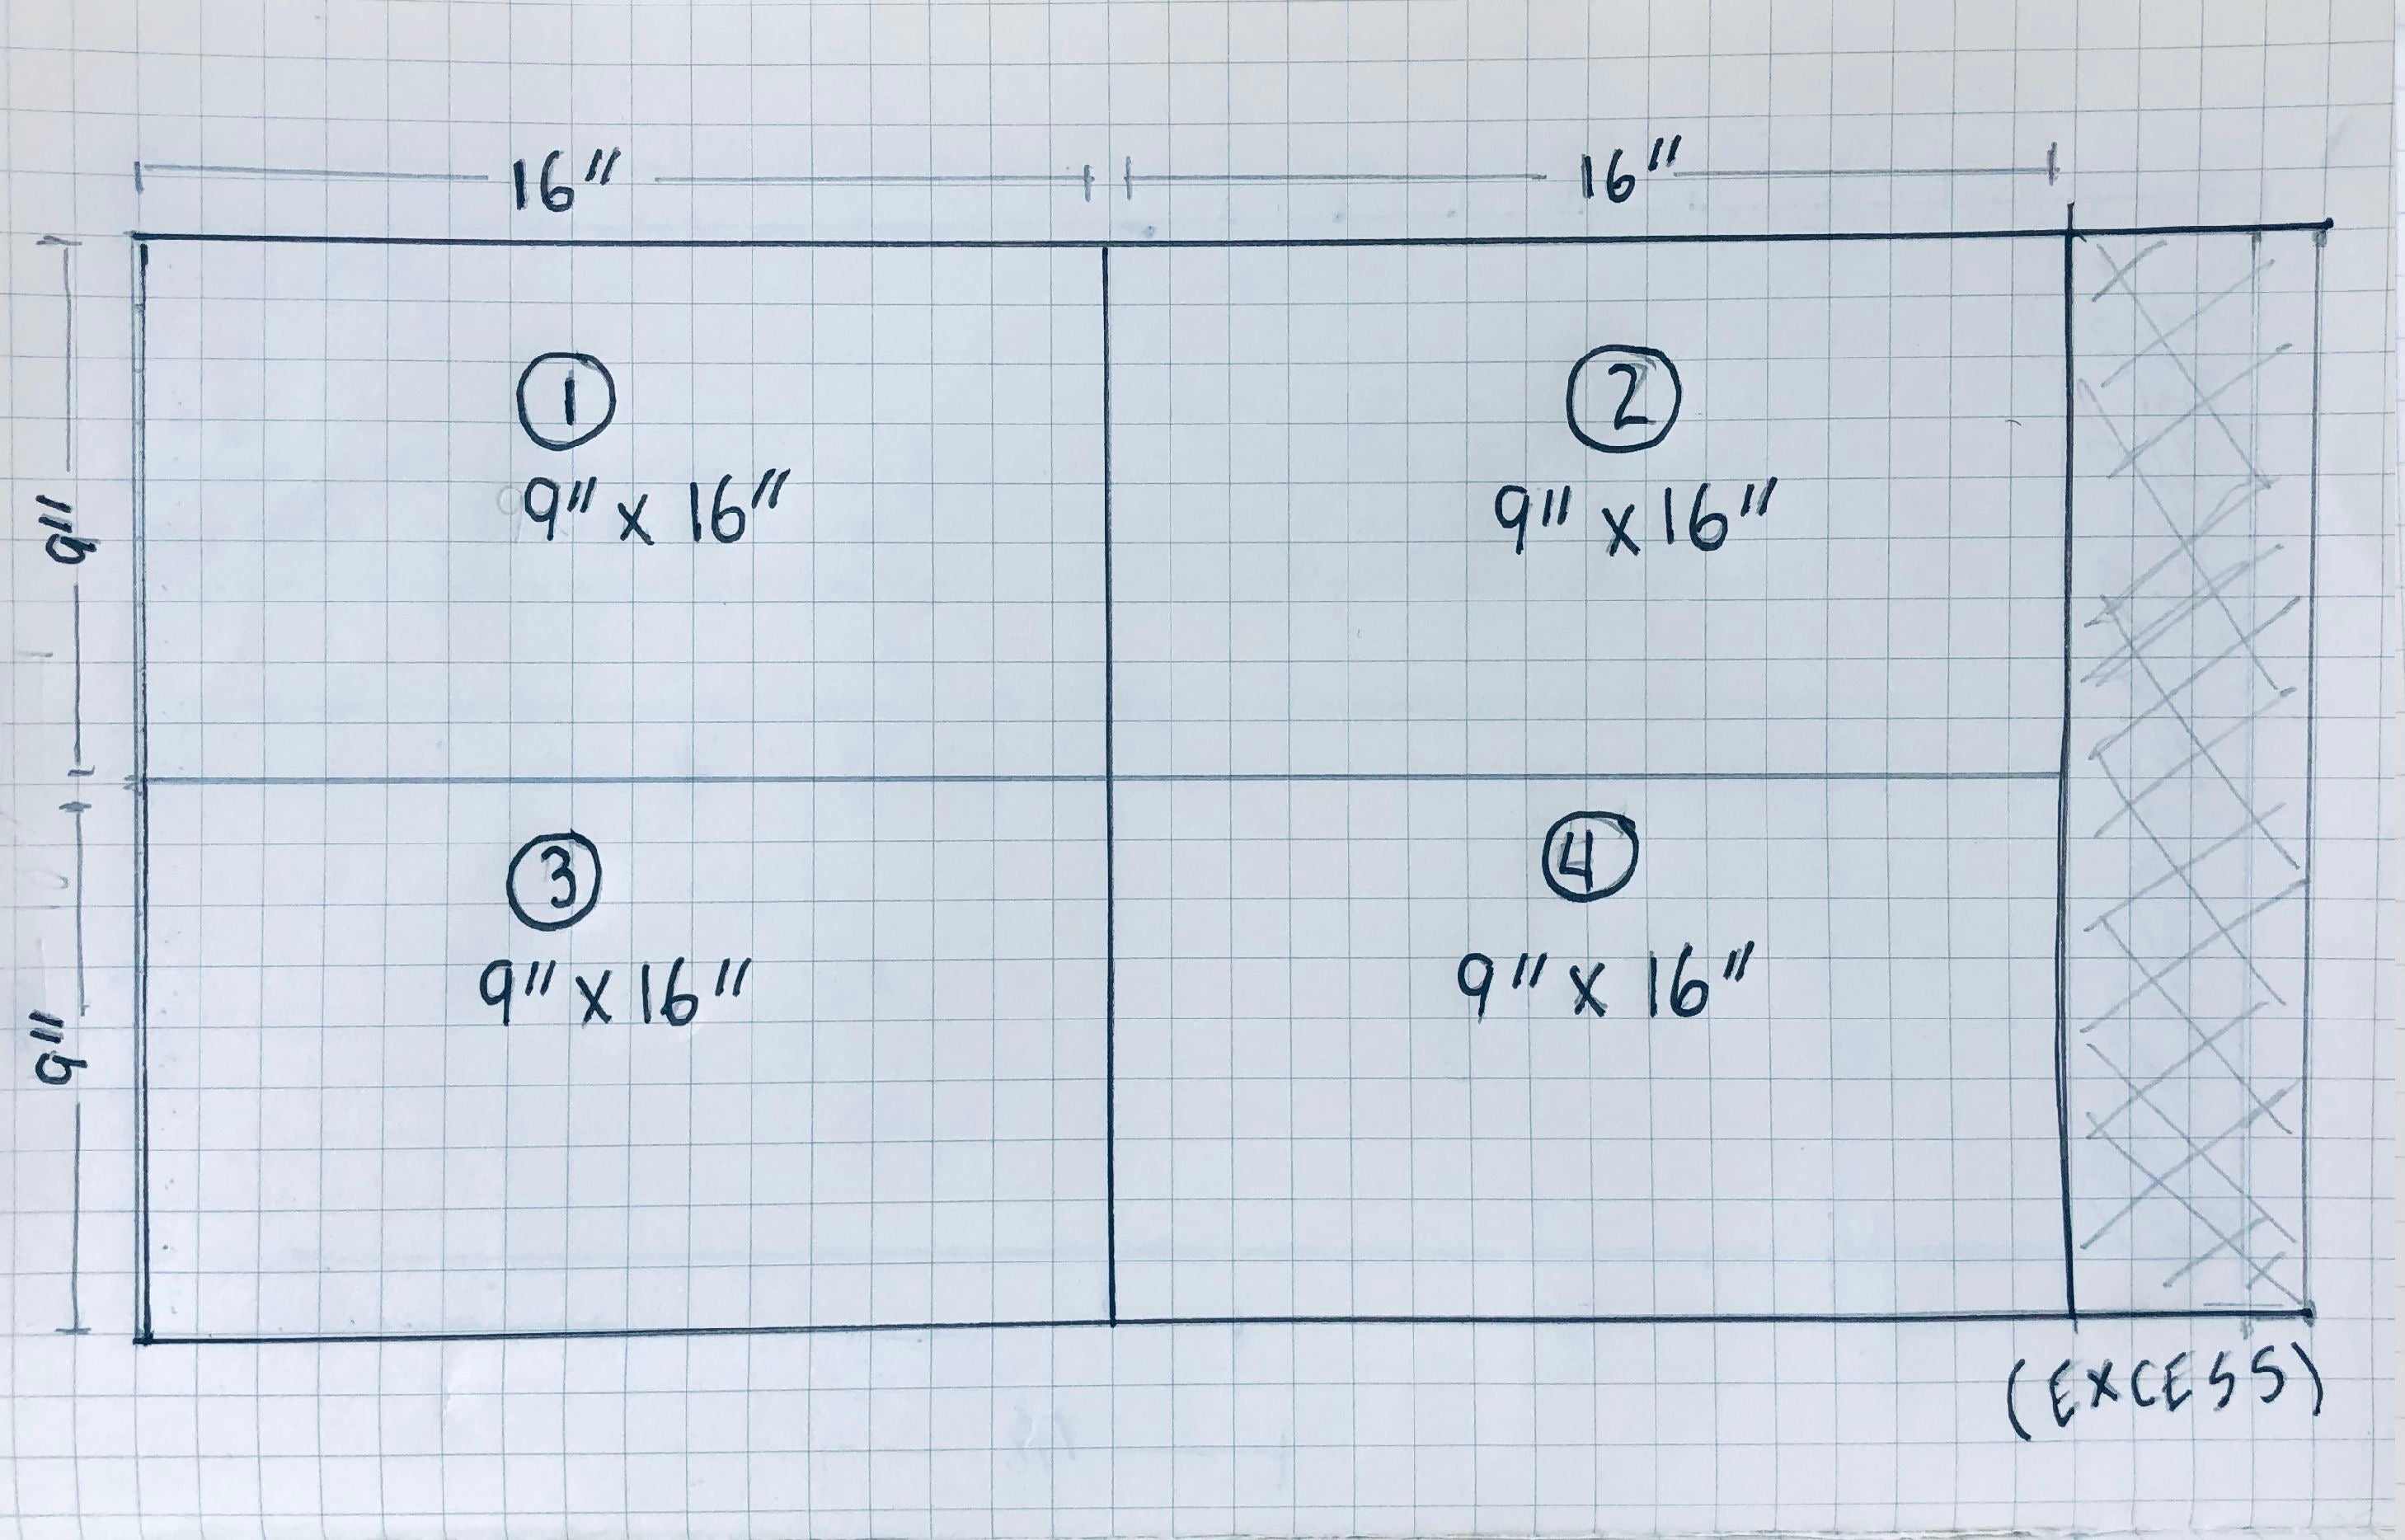

Step 1 – Cutting of the shields and and headband strips. Two of the 18" x 36" sheets will produce 6 shields and 6 headband strips. You can use a sharpie or blue tape to help you cut straight lines. For the shields, we've found that using a 9" x 16" cardboard template helps. You can also use 1" blue tape for making cutting guides for the headband strips.

Step 2 – Cut a 16" wide strip of the 1" foam with scissors. Scissors are your best tool for this job. This piece will be used for the face shield forehead padding. Please note: don't worry about the moon shape here of the foam, it's that way because it comes in a roll.

Step 3 – Remove adhesive backing and apply the 16" wide foam strip. Important: Apply foam to the curvy side of the plastic shield where the left and right sides curl up towards you. Press firmly. FYI: We've pre-marked the bottom rounded edges. We'll cover the cutting of these corners at the end of the tutorial.

Step 4 – Attach both the hook and loop velcro pieces pieces to each other and cut a 16" strip. (For the velcro, don't lose sleep over what side is the hook, and what side is the loop...it doesn't matter for this design.)

Step 5 - Now separate the two velcro pieces. Attach one of the velcro pieces to the front of the face shield. The 1" forehead padding on the other side can be your guide since it's 1" in height as well.

Step 6 - Take the remaining piece of the 16"velcro and attach it to the middle of the 1"x 30" headband. Centering tip: You can use a bit of blue tape to mark centers of the headband and shield to get the exact center.

Step 7 - Attach the 30" headband to the front of the face shield. Press down firmly.


Step 9 - Now it's time to add the velcro the ends of strap which will hold the face shield in place. Attach a hook and loop and cut it down to one 6" strap. Take one of the velcro halves (doesn't matter whether it's a hook or a loop) and adhere it to the front side of the shield with some pressure. I like to do the right side of the shield first, but it doesn't matter.


And yes, you can easily fit a face mask underneath the shield.


Our goals for Open Source Shield:
- Help protect those healthcare and frontline heroes who protect us.
- Open source the design (via materials list and tutorial) so that anyone can make these face shields in their homes and distribute them locally.
- Don't reinvent the wheel. Our design is based on manufactured face shields that have been approved by the FDA that are now in short supply. We beefed up the materials to make this face shield durable, yet still comfortable.
- The assembly of the Open Source Shield (OSS) should be simple and fast. So simple and fast that it can be made by anyone with household tools in 5-10 minutes.
- Materials should be easily available. All build items for this design are available on Amazon. Except for the the plastic sheeting, you can find these items at most hardware stores. We're in California – the first state to institute a stay-at-home order. Hence using Amazon as our preferred supplier. If you do need to get these supplies at a hardware store, please practice social distancing and wear a homemade face mask along with gloves.
- We look forward to the day when there are enough face shields and we can shut this down. In the meantime we're here to help all we can.
FYI, we're using Megadeluxe Caps' ecommerce website to host this face shield tutorial. The ecommerce platform Megadeluxe uses doesn't charge for extra bandwidth. We wanted to cover ourselves in case this blew up and started getting huge amounts of traffic.